You already know the damage the sun can do to your skin: wrinkles, sunspots, an increased risk of skin cancer and more. So, if you want a healthy tan, you likely should go the fake route – and, no, we don’t mean tanning beds!
We know that’s easier said than done. Whether you choose professional spray tans or at-home tanning products, fake tanning can be a huge commitment. It’s not as simple as rubbing on some lotion. Here are a few things you should know about a proper fake tan routine so you can decide for yourself whether it’s worth the hassle.
Exfoliation
Whether you use a spray, a lotion, a mousse, or any other tanning formula, dry skin that hasn’t been smoothed can cling to the product and leave you looking blotchy. This is why it’s important to exfoliate your skin using an exfoliating mitt or scrub – or by shaving – before you apply the product.
Tanning Mitt
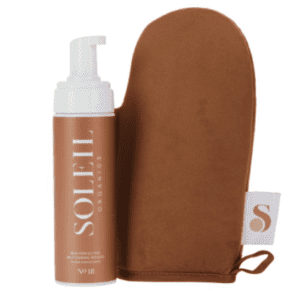
To apply a mousse or cream based self-tanner at home, you’ll benefit from a tanning mitt. Plan to wash it if you want to reuse it, and buy another when it has reached the end of its life. If you don’t use a tanning mitt, you’ll have to scrub your hands after applying the tan to prevent them from turning orange. Our tanning mousse pick – Soleil Organics (shop here).

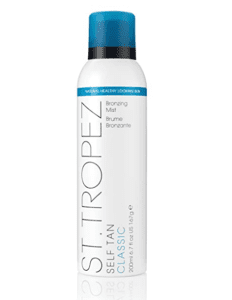
We prefer using an at-home spray tan because we find that the coverage is more consistent and you can do your whole body on your own. We recommend doing this outside in the grass or in an enclosed shower. Our pick – St. Tropez Self Tan Bronzing Spray, 6.7 Fl Oz (shop here).

Prep
Be sure to cover your hair with a shower cap. If you want to avoid getting spray tan on your nails, apply lotion to your nails and simply wipe off the lotion after you are done.
Drying and Processing Time
Fake tanning typically requires some downtown after application so that you don’t mess up your clothes, sheets, or anything else with which your skin might come in contact. You may feel a bit sticky and may need to hang out naked for a while as it dries.
Pro tip: take a large powder brush, dip it in baby powder, tap off the excess, and apply the baby powder to spots where your skin creases – under your arms, neck, etc. The baby powder will help prevent lines from forming when the spray or mousse dries!
After that, you need to wait an average of four to eight hours before rinsing off. You don’t need to do this if you used a white or clear product, but in that case, you can get streaky because you can’t see where you applied. With a brown product, you need to rinse off that top layer of guide color to reveal your actual tan.
Risk of Stains
If you sit down or go to bed too soon after applying your fake tan, you can get brown or orange stains on your clothes, sheets, or furniture. The stains will usually wash out, but sometimes, they don’t! It’s better to put dark towels down if you have to sit somewhere before you are completely dried.
Moisturizing
Plan on maintaining regular moisturizing with an oil-free product to help your fake tan last as long as possible – and help it fade away evenly. If you let your skin dry out, your tan could flake as the color fades off in patches.
More Exfoliation
Once your fake tan begins to fade, you’ll want to start over. But you can’t put fake tan on top of fading fake tan! Instead, it’s best to exfoliate off what is left of the original tan and prep for another round.
Fading
If you do everything right, fading should happen after about a week and look relatively natural. But even with the best intentions and products, you could still get patchy areas around your knees, elbows, neck, or collarbone. You can gently exfoliate those areas to blend out the patches.
Repetition
Fake tanning is not a one-and-done thing. If you want a tan all season long, you will need to reapply and do this whole process again about once a week.
The Verdict
Knowing all of this, what do you think? Is fake tanning worth it for you? If so, check out this list for some of the best at-home self-tanning products.


